Fix These First: 3 Aging in Place Renovation Priorities for Homeowners
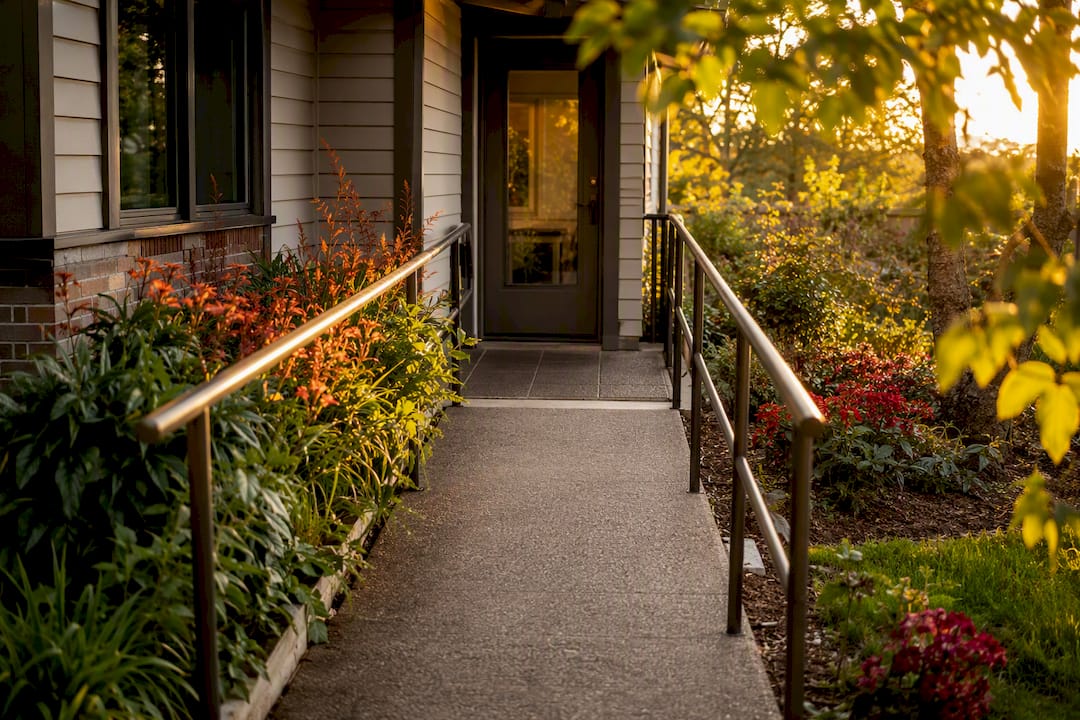
Start with the entry and the main bathroom. A step-free front door, a curbless shower with properly placed grab bars, non-slip flooring and brighter lighting deliver the fastest safety return on any ageing in place renovation. Systematic reviews confirm home modifications reduce falls in most studies assessed, and Phoenix Projects sees the same pattern in site consultations across South East Queensland. A Certified Ageing-in-Place Specialist or a drafter-led home audit is the right next move before any tools come out.
TL;DR:
Prioritize low-cost, quick-install safety upgrades like grab bars, improved lighting, and non-slip flooring before undertaking structural modifications.
Focus on entry and bathroom modifications early, such as step-free entrances and curbless showers, to significantly reduce fall risks.
Use professional site consultations and detailed concept drawings to accurately scope and budget formal renovations, especially for major structural work.
Pair accessibility improvements with existing renovation plans to save costs, reduce disruptions, and ensure future-proofing as needs evolve.
Implement ongoing maintenance checks and integrate smart technology carefully, after physical barriers are addressed, to enhance long-term safety and independence.
Table of Contents
Room-by-room ageing in place renovation guide
A good ageing in place renovation isn’t one big job. It’s a sequence of smaller, well-specified changes that add up. Here’s how to brief a drafter or tradesperson room by room.
Entry and exterior. A step-free main entry needs a landing at least 1200mm by 1200mm so a wheelchair or walker can pause and turn before the door. Ramps should have a shallow slope, recommended to be no steeper than a gentle incline, with continuous handrails on at least one side. Motion-sensor lighting at the door and along the path matters more than most homeowners expect. Brighter LED lighting often delivers outsized benefits for ageing eyesight, and it costs a fraction of structural work.
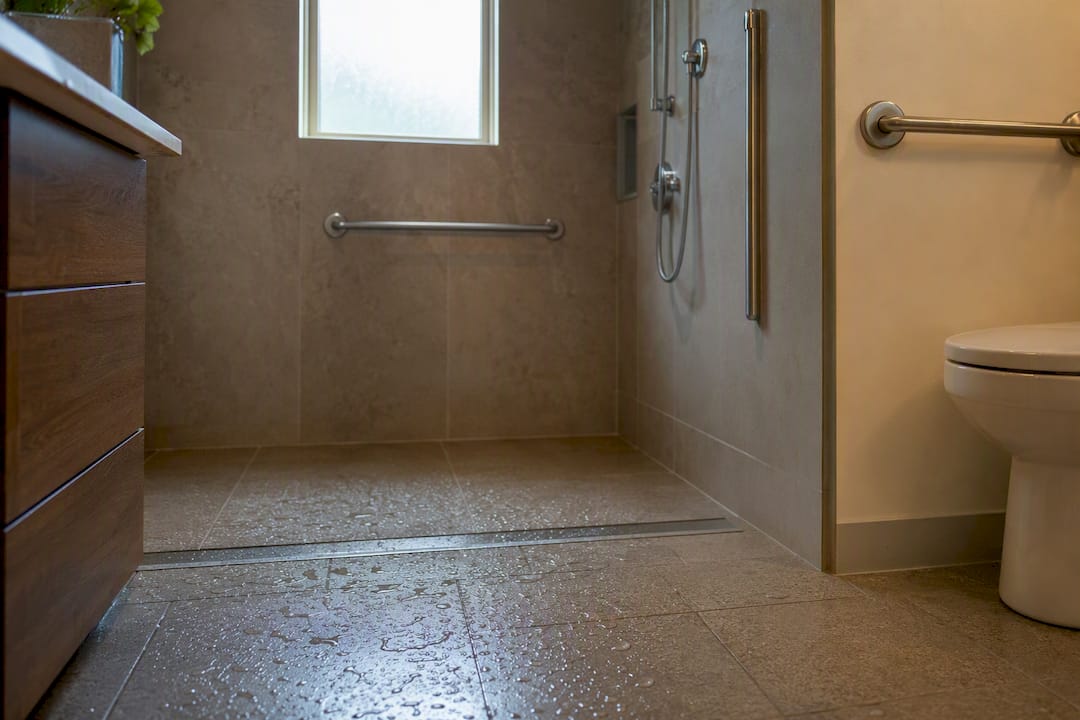
Bathroom. This is the room where falls happen most often, and it’s where a curbless shower earns its keep. You need roughly 900mm by 900mm of clear shower floor for a wheelchair-accessible design, with a fall of about 1:50 towards a linear drain. Grab bars go where hands actually reach: beside the toilet, inside the shower at a convenient height, and near the vanity. Even if you’re not installing bars today, ask your builder to add blocking behind the wall sheeting during any retile. Future-proofing tricks like this cost almost nothing at reno time and save a wall demolition later. Non-slip porcelain or textured vinyl, a raised toilet, and a fold-down shower seat round out the brief.
Kitchen. Worktops at a single fixed height suit some households; others benefit from a section lowered to 800mm for seated use, with open knee space beneath. Pull-out shelving and drawers beat high overhead cabinets for reachable storage. Lever taps and anti-scald mixing valves are cheap upgrades with real safety payoff for anyone with reduced grip strength or slower reflexes.
Circulation. Hallways and doorways are where good intentions die if nobody measures first. Aim for doorway clearances sufficient for wheelchair access and hallways wide enough for a comfortable turning circle. Flush thresholds, or ramped transitions no higher than 6mm, stop wheels and feet catching.
Living areas and bedrooms. Lever door handles, switches at reachable height, and flooring with genuine slip resistance (not just a marketing label) matter here. Choose low-pile carpet or matte, textured hard flooring over anything glossy.
Stairs. Handrails on both sides, contrast nosing on each step, and even lighting reduce risk immediately. If mobility is likely to decline, weigh a stair lift against replanning for single-level living: the second option costs more upfront but removes the problem entirely rather than managing it.
Retrofit what you can (grab bars, lighting, taps) before considering structural replans.
Ask for durable, low-maintenance finishes: porcelain over natural stone, mixed-material thresholds over timber that swells.
Structural work is needed whenever you’re moving plumbing, widening a load-bearing doorway, or changing floor levels.
Pro Tip: Get blocking installed behind wet-area walls any time you’re already opening them up for a retile or re-plumb. It’s the cheapest insurance you’ll ever buy against a future accessibility upgrade.
Which renovations should you prioritise first?
Not every accessible home renovation needs to happen this year. Grouping projects into three tiers helps you sequence spending sensibly.
Tier 1: Immediate safety. Grab bars, non-slip mats or flooring patches, improved lighting, and removing trip hazards like loose rugs. These are typically low-cost, fast to install (days, not weeks), and cause minimal disruption. Practical guidance from NerdWallet suggests grab bars and non-slip surfaces sit among the most cost-effective safety upgrades available.
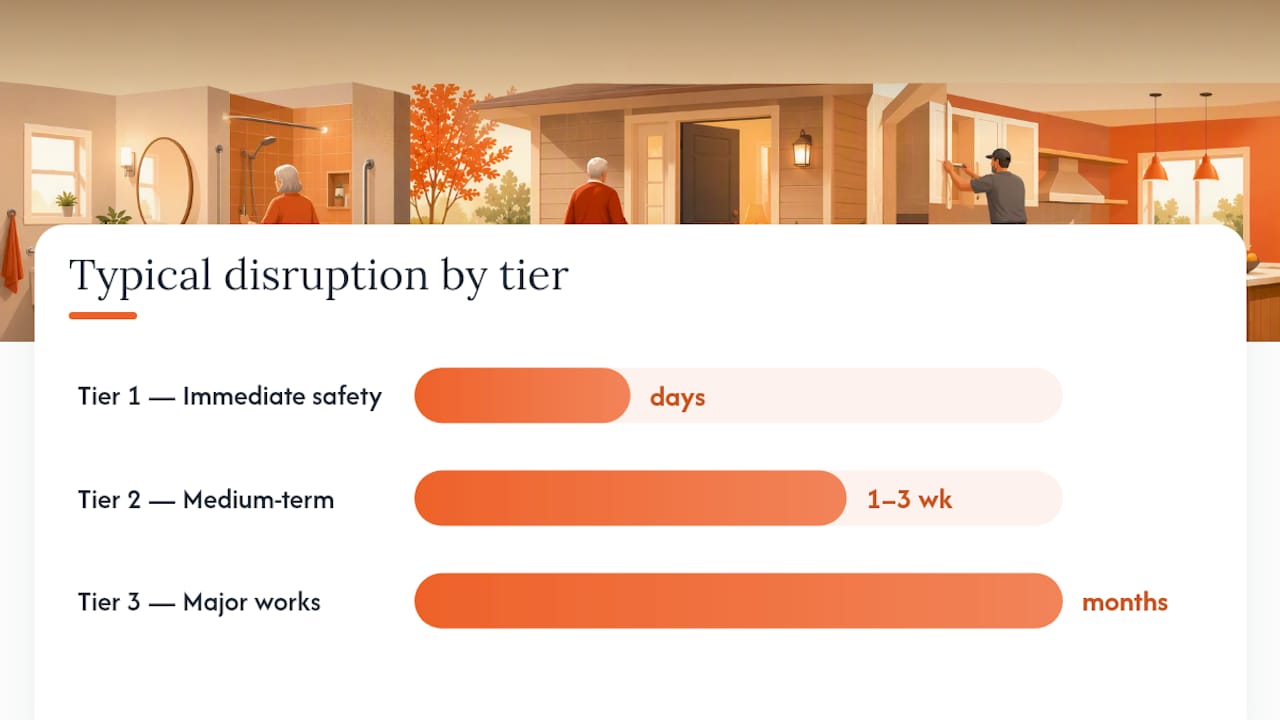
Tier 2: Medium-term comfort. Curbless showers, widened doorways, lever tap replacements, entry ramps. These jobs involve trades and usually take one to three weeks, with the home partially liveable throughout. Costs vary widely by region and scope, so treat any figure as a rough guide until a builder quotes your specific job.
Tier 3: Major structural works. Internal replanning, home elevators, or relocating living spaces to a single level. These are multi-month projects with real disruption, and they’re where a drafter’s concept drawings earn their fee by avoiding costly redesign mid-build.
The evidence for acting early: Home modifications reduce falls and support functional independence in many reviewed studies. That’s a strong enough signal to justify Tier 1 works even on a modest budget, before any full remodel is on the table.
Smart sequencing saves money. Pair your entry step-free conversion with planned porch or landscaping works. Add bathroom blocking during a scheduled retile rather than as a standalone job. Combining accessibility works with renovations you’re already planning cuts both cost and disruption significantly compared with tackling each change in isolation.
Tier 1 first, always, regardless of whether bigger works are planned.
Tier 2 alongside any renovation you’re already budgeting for.
Tier 3 only after a proper feasibility assessment and concept drawings.
How do you plan and start an ageing in place renovation?
Step 1: Run a home audit. Walk through with a tape measure. Record door widths, step heights at every entry, and whether your main bathroom has enough clear floor space to turn a wheelchair (roughly 1500mm diameter is the usual benchmark). Note where lighting is poor and where flooring is slippery when wet.
Step 2: Build a priority list, then brief a drafter. Rank your findings against the three tiers above. A drafter turns that list into concept drawings that show exactly what’s structurally possible in your home, which stops expensive surprises once a builder is on site.
Step 3: Gather quotes properly. Give every contractor the same brief. Ask specifically about accessibility experience, not just general renovation history, and confirm warranty terms on wet-area waterproofing and any structural changes.
Step 4: Check permits and specialist input. Structural changes usually need council approval. If mobility needs are complex or likely to change quickly, loop in an occupational therapist or structural engineer before drawings are finalised.
Tape measurements of every doorway, hallway and step.
Photos of the bathroom, entry and any stairs from multiple angles.
A written list of current and anticipated mobility needs.
Copies of any existing floor plans, if you have them.
Pro Tip: Bring your audit notes and photos to the first site consult. It cuts the back-and-forth and gets you to accurate concept drawings faster.
What standards and evidence should guide your renovation brief?
Specify real numbers in your brief, not vague terms like “accessible.” Doorway clearances of 820 to 915mm and a turning circle around 1500mm are commonly cited benchmarks from NAHB’s ageing-in-place checklist, though local building codes should always get the final say.
The case for acting isn’t just anecdotal. Roughly 65% of reviewed studies found home modifications reduce falls and support independent living, and the National Institute on Aging frames home modification as one part of a broader fall-prevention strategy alongside strength and balance work.
Universal design principles help here: flexible use (a bench that works standing or seated), simple operation (lever handles over knobs), and perceptible information (contrast strips on step edges). Apply these even to small jobs.
Verify exact clearances against your local building code before finalising drawings.
Loop in occupational therapy input for anyone with a diagnosed mobility condition.
Ask any specialist you engage whether they hold CAPS accreditation or equivalent training.
Why work with a drafter for this kind of renovation?
A drafter’s job is feasibility first: what’s structurally realistic, what needs an engineer, and how the pieces fit into one coherent brief instead of a dozen disconnected trade quotes. Phoenix Projects runs a site consultation, produces concept drawings tailored to your priority list, and coordinates ballpark estimates from local builders so you’re pricing an actual plan, not a guess. That consultation typically clarifies scope enough that quotes come back tighter and comparisons between builders become genuinely apples to apples. It’s the step that turns a wish list into a buildable project.
How do emergency response systems fit into the plan?
Physical modifications reduce the chance of a fall. Emergency response systems reduce the consequences when one happens anyway, and the two work together rather than as alternatives.
Wearable call buttons and pendant alarms remain the simplest option, connecting to a monitoring service or a family member’s phone at the press of a button. Fall detectors have moved well beyond basic accelerometer models. Many now use passive sensors that don’t require the person to wear or press anything, which matters for anyone who might be too disoriented or injured to act after a fall.
Wiring matters more than people expect. If you’re already opening walls for other accessible home renovation works, that’s the moment to run low-voltage cabling for a hardwired system rather than relying purely on wireless units and battery replacements down the track. Bathroom and bedroom placement should get priority, since those are the rooms where falls most often go unwitnessed for hours.
Talk to your drafter early if you want a hardwired system integrated cleanly, particularly around new stud walls or ceiling cavities opened during bathroom or entry works. Retrofitting cable after the plaster’s closed up costs far more than doing it during the build.
Does smart home technology actually help you age in place?
Voice-controlled lighting, thermostats and door locks solve a genuine problem: reduced grip strength or reach shouldn’t stand between someone and a light switch. Automation extends that further, with lights on motion sensors along hallways and to bathrooms cutting the risk of a fall in the dark far more reliably than remembering to flick a switch.
The trap is treating smart tech as a substitute for physical accessibility work rather than a complement to it. A voice-activated lock on a door with a 150mm step is still a door with a 150mm step. Sequence it correctly: fix the physical barriers first, then layer automation over the top.
Practical starting points include smart plugs for lamps, voice assistants paired with compatible lighting and thermostat systems, and video doorbells that let someone confirm a visitor’s identity without walking to answer the door. None of this requires a full smart home overhaul. Start with the two or three points of daily friction that cause the most frustration, and build from there.
Why do thermal comfort and air quality matter in an ageing in place renovation?
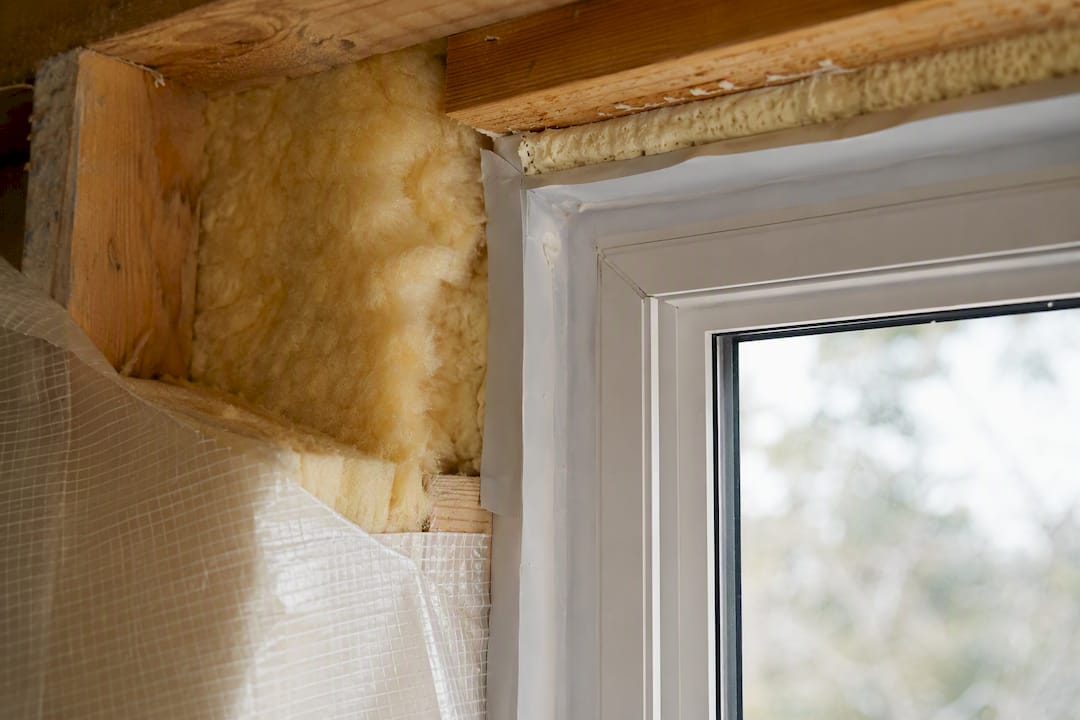
Older bodies regulate temperature less efficiently, which makes thermal comfort a genuine safety issue rather than a lifestyle preference. Insulation upgrades, draught sealing around doors and windows, and zoned heating and cooling reduce both the health risk of temperature extremes and ongoing running costs.
Indoor air quality deserves equal attention, particularly in bathrooms and kitchens where moisture and cooking fumes accumulate. Proper exhaust ventilation, especially in a newly sealed curbless shower enclosure, prevents mould growth that can aggravate respiratory conditions common in older adults. If you’re renovating a bathroom anyway, upgrading the extraction fan is a minor add to the budget with an outsized health benefit.
What ongoing maintenance keeps an accessible home safe?
Accessibility features only work if they’re maintained. Grab bars need periodic checks that wall anchors haven’t loosened. Non-slip flooring finishes wear down over years of foot traffic and need resealing or replacement before they quietly stop doing their job.
Choose finishes and fittings with maintenance in mind from the start. Textured tile that’s easy to hose down beats a porous natural stone that needs regular sealing. Lever taps with replaceable cartridges save a full fixture replacement down the track. Building a simple annual checklist, checking handrail fixings, testing emergency call systems, clearing gutters near ramps, keeps small problems from becoming safety issues.
When should you bring in professional assessments and specialist contractors?
A DIY safety pass around the house is a fine start, but complex mobility needs deserve a professional eye. Occupational therapists bring assessment skills that catch problems homeowners miss, like a grab bar placed for today’s needs but wrong for how mobility might change in two years.
Look for contractors with genuine experience in senior living renovations, not just general renovation work. Ask directly how many accessible projects they’ve completed and request references from those jobs specifically. A Certified Ageing-in-Place Specialist credential signals training in the dimensional standards and sequencing that generic renovation experience doesn’t always cover.
How do you plan spaces that can adapt as needs change?
The mistake many homeowners make is designing for today’s mobility level only. A smarter accessible home design plans for a range of future scenarios without overbuilding now.
A home office with a wide doorway and reinforced flooring can become a ground-floor bedroom later. A powder room built with slightly generous clearances today avoids a full rebuild if a wheelchair enters the picture in ten years. Modular furniture and adjustable-height benching let a kitchen or bathroom shift with changing needs without a second renovation.
This is where a drafter’s concept drawings prove their worth: mapping not just what you need now, but what minor upsizing or blocking now saves you from redoing later.
The priority most homeowners get backwards
Most homeowners I see in this space start with the bathroom because it feels like the obvious accessibility project. That’s not wrong, but it’s often the second move, not the first. The entry deserves equal or greater priority. If someone can’t get into their own home safely and independently, every other accessibility improvement inside becomes moot the moment they’re stuck on the porch.
The other pattern worth challenging: treating this as one renovation event rather than a staged plan. Full remodels sound decisive, but they front-load cost and disruption onto people who often benefit more from immediate, low-cost fixes now and structural work later, once needs are clearer. Tier 1 work rarely needs a drafter. Tier 3 work almost always does, and that’s exactly where a proper site consult and concept drawings stop a good idea turning into a budget blowout. Get the sequence right, and the spending follows the actual need rather than the anxiety of “doing something big.”
— Daniel
Ready to plan your ageing in place renovation?
Phoenix Projects turns a room-by-room wish list into a buildable plan, with concept drawings that show exactly what’s feasible before a single wall comes down. Where a general contractor quote often assumes scope, our site consultation and ballpark estimate process gives you a clear picture of cost and staging upfront, so Tier 2 and Tier 3 decisions get made on facts rather than guesswork.

If you’ve worked through the room-by-room checklist above and know roughly where your priorities sit, the next step is a site consultation and ballpark estimate to test that plan against your actual home. For homeowners still mapping out sequencing, the Renovation Planner helps organise priorities before you brief anyone. Bring your audit notes and photos, and book a consultation online to get concept drawings moving.
Sources
Recommended
Comments